Host header (aka domain names or host names) let you assign more than one site to a single IP address on a IIS Web server. In SharePoint context, may you need individual host-named such as http://thuansoldier.net instead of http://thuansoldier/.
When you create new Web application and then create new site collection, you will make difficulties for end user. They don’t want complicated URL with port number. In this post, I will configure host header via DNS and IIS 7.5. in order to facilitate URL of Web application. All of them are visual but you can use Windows PowerShell to do this rapidly.
Create new Web application
Open Central Administration > Application Management > Manage web applications (under Web Applications). Click New in Ribbon.
I will select Classic Mode Authentication because I haven’t configured Kerberos yet for fully configuring Claim-based Authentication. Under Name, you can type name of Web application. You should name it simply to remember and manage. Please notice under Port and Host Header. Because I want to facilitate URL for end-user thus I select port 80. I continue to type URL: portal.ict24h.net.
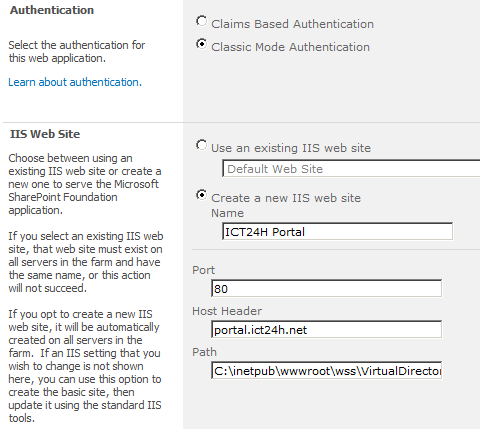
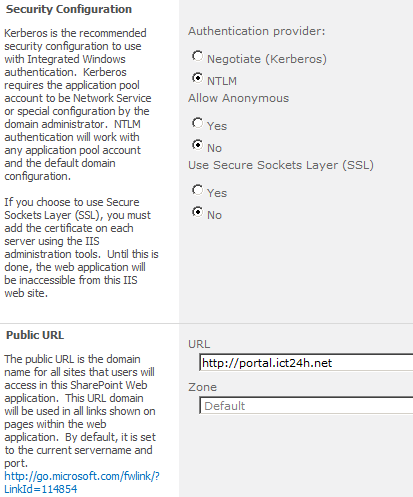
At Security Configuration settings, I will keep by default all. Under URL at Public URL, I delete port 80 and keep so as below image.
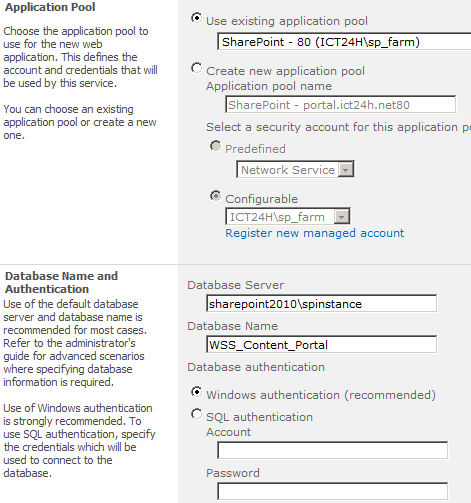
 I use exist application pool. Under Database Name at the Database Name and Authentication, I reduce name of Content database because GUID is so complicated. This make you manage content database effectively.
Now, you can select service application connection and then click OK to create new Web application.
Register the host header in DNS Server
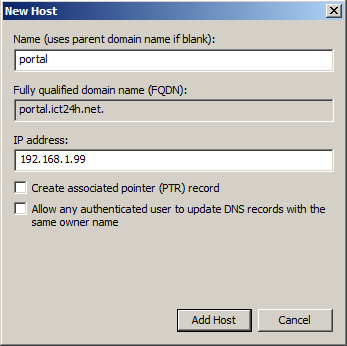
In my DNS server, I create new host A.
 Type host name under Name and IP of Web server. Click Add Host.
Configure host header for a Web application
Above all, you check Web applications in Central Administration or IIS Website. Because I will do configuration in IIS thus I will check exist Web application in IIS.
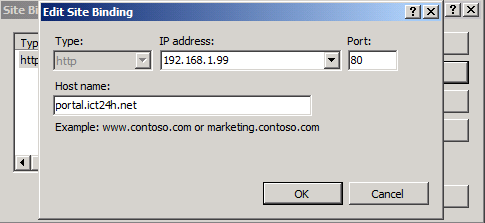
In IIS Manager, right click in Web application that needs to be configured host header and then click Edit Binding. In Site Bindings dialog box, click Edit. At IP address option, select IP address of DNS Server. UnderHost name, type your host name. My domain name is ict24h.net thus I want to use my SharePoint site with this domain name. Click OK.
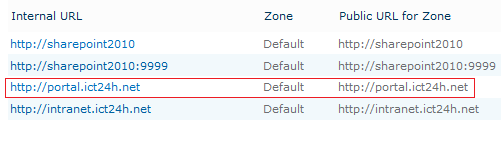
Open Central Administration > Application Management, under Web Applications , click Configure alternate ccess mappings. Verify that the URL for the default zone is set correctly.
However, when you open portal.ict24h.net whether in Internet Explore 8 or Mozilla Firefox 3.5, you will encounter 404 Page Not Found error. What’s up? Yes, you haven’t created Site collection in your Web application yet. Thus you will encounter this error.
At Central Administration, click Application Management > Create site collections (under Site Collections). Please notice your Web application that you just created namely portal.ict24h.net.
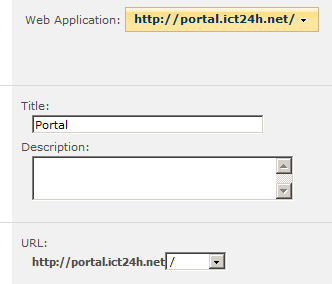
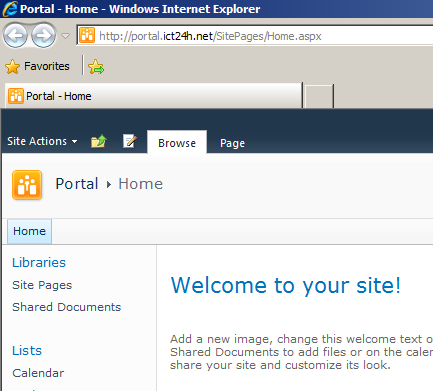
Then configure some information. Open your site collection with URL portal.ict24h.net.
Fuente:
No hay comentarios:
Publicar un comentario