Some list actions are available only when you click inside an impersonation step in a workflow. Use impersonation steps to have the workflow perform actions by impersonating the workflow author instead of the workflow initiator. Impersonation steps are useful in scenarios such as approval and publishing, where the people submitting content for approval and the people approving content have different permissions. Impersonation steps are also helpful in automating site administrator tasks, such as a workflow automatically assigning permissions to users.
Add List Item Permissions
This action is initially displayed in workflow steps as Add these permissions to item in list. It grants the permissions of the specific permission levels for an item to specific users.
Inherit List Item Parent Permissions
This action is initially displayed in workflow steps as Inherit parent permissions from item in this list. If your item has unique permissions, you can use this action to make the item inherit the parent permissions from the list.
Remove List Item Permissions
This action is initially displayed in workflow steps as Remove these permissions from item in list. It removes permissions from an item for specific users.
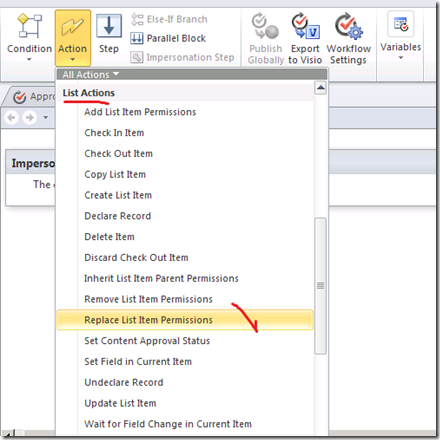
Replace List Item Permissions
This action is initially displayed in workflow steps as Replace these permissions of item in list. It replaces an item's current permissions with the new permissions that you specify in the action.
EJEMPLO
Step 1:
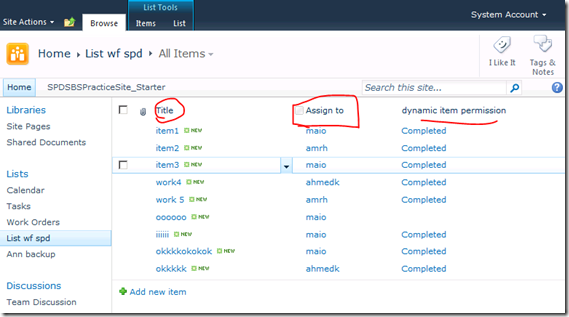
Create a custom list, you will have Column named Title by default, created another column named Assign to of type people and group.
and that’s it for the list.
Step 2:
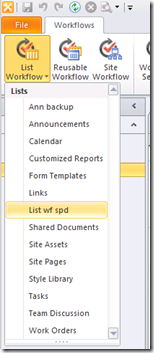
Open your site in SharePoint Designer, click on workflow on the left navigation,
from ribbon on top, click list workflow, and choose your custom list you just created,
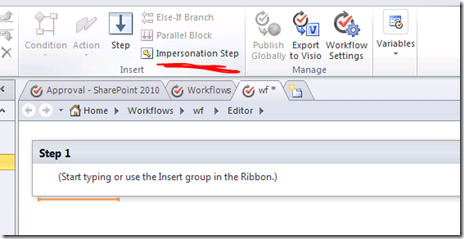
First put your mouse out of Step 1, and insert Impersonation Step, then remove Step 1 as we don’t need it
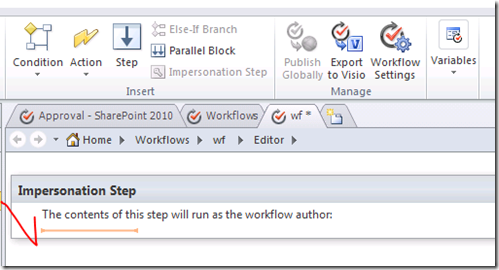
It should look like this:
Now put your mouse inside the Impersonation Step as this will make you see More Actions,
click on Action from ribbon, and under list category > click Replace item permission
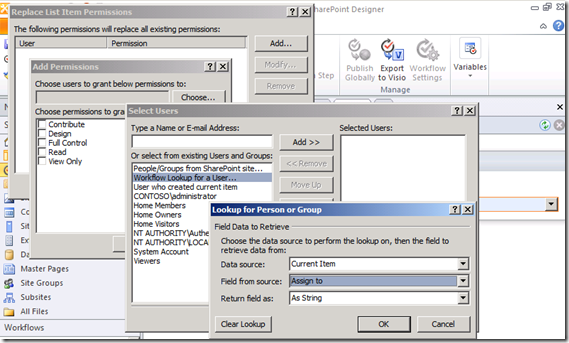
Click on these permissions link, and click add, then click choose, don’t check on any check box of those permissions now,
we will come to it later, from Select users windows > click Workflow Lookup for a user, click add, keep datasource to current item,
from field from source, we will choose the Assign to column that we created in our custom list, now click ok till you reach to
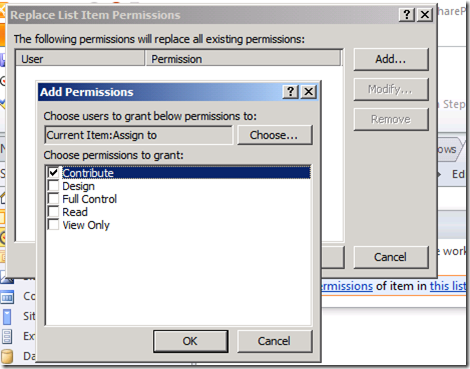
the Add permissions windows, from here, based on your needs, choose the permission you want to give to the user,
who will work on the item created for him/her.
I choosed Contribute, but choose what suites you.
The second link is this list, we will choose the default, keep it current item.
Now save and publish, you will see the display message, give it ok, this is because of the impersonation step.
Now go to your site in the browser, and to our custom list, create new item, type in the assign to column,
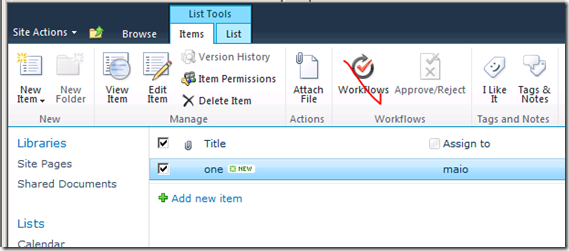
the user who should have permissions on this item. and click the item, and from the ribbon choose Worflows, or
from the dropdown menu on the item title, or from dialog when you open the item,… more than one way..
you will see your workflow name that you created, click on it and click on start.
Now you should see on your custom list, that workflow completed, as we don’t have much steps, its only one.
you can add more based on your needs.
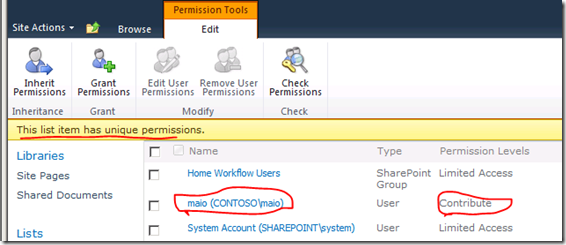
If you go now to see this item permission, you see it is not inherting anymore, but it has unique permissions and
and user you wrote in assign has the permission that we chose while create SharePoint Designer workflow.
Fuente:

Este comentario ha sido eliminado por un administrador del blog.
ResponderEliminar