The ECM features of SharePoint 2010 are excellent. The best thing is the extendibility of the platform using SharePoint designer and Visual Studio. By default SharePoint includes field types such as Single line text, multi-line text etc. The following is the snapshot of the fields available in SharePoint 2010
The out of the box field controls are useful for most situations, but still you may need additional field types when building business applications. Fortunately you can build custom field controls using Visual Studio 2010 and deploy to SharePoint. Custom field control can provide a unique editing and display experience. Custom field controls can be used to include custom client-side validation and a unique editing experience.
In this article I am going to demonstrate how you can build custom field control for SharePoint 2010. For the purpose of this article, I am going to build a custom field control that inherits the single line of text. When displaying the control, it will show the entered text in <h1> tags. Also the field will convert the text to upper case while displaying. The custom field will throw error if it contains more than 10 characters. The examples looks simple, my intention is to show you how easily you can build custom controls. In real time you can add your business logic to build your own field controls.
Open Visual Studio, from the file menu select new project. In the new project dialog, select empty SharePoint project as the template. I have named the project as “MyCustomFieldProject”
In the SharePoint customization wizard, make sure you select “deploy as farm solution”. Also you can enter the local site URL where you can deploy the custom field.
Click the Finish button. Visual Studio will create an empty project. In Visual Studio solution explorer, the project looks as follows.
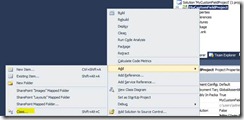
Now you need to add a class to the solution that represents the custom field. Now right click the project and select Add -> Class
I have named the class as “MyHeaderField”
The class just created have the following code.
Now you need to set the class as public. You need to include the using statement to include Microsoft.SharePoint to get access to the Sharepoint built in types. As I mentioned initially MyHeaderField needs to inherit the SharePoint Text field which is “SPFieldText”. Now you need to override the 2 default construtors. After making the mentioned changes, the code file looks as follows.
Now I am going to override 2 methods as follows.
- GetValidatedString – This will be used to validate the data before saving to database.
- GetFieldValueAsHtml – this is how the value will be displayed in the page.
The implementation of the methods are as follows.
Each field type you define should have a corresponding entry in the form of XML file in the XML folder under 14\Template folder. The XML file will have the following naming convention
- It should start with fldtypes_
- After _ you can define the field name. It is a good practice to specify the class name as the field name, though it is not a must
- In the XML file, you need to define the fields such as TypeName, parent type name, type display name, corresponding class and assembly.
Now in the Visual Studio project, you need to add a XML file and while deploying it should be deployed to the folder 14\Template\XML. To do this, you can add a mapped folder to your project. Right click the project in solution explorer, select Add -> SharePoint mapped folder
In the Add mapped folder dialog, expand Template and select XML
Now you can see the XML folder under your project. Any files created here will be deployed to the 14\Template\XML folder in the SharePoint farm where the solution is deployed. Now you need to add the XML file for your field.
Right click the project, select Add -> New Item. Now in the template selection, select Data as the category and then select XML as the file type. I have named fldtypes_MyHeaderField.xml
I have updated the content of the XML file as follows. Be noted that $SharePoint.Project.AssemblyFullName$ will be replaced automatically by the correct assembly name wile deploying. All the other fields are self-explanatory.
Now we are done with all the requirements. From the solution explorer, right click the project and click deploy.
Once deployed, you can add new columns to SharePoint lists and libraries with the type “MyHeaderField”. Add the new column to SharePoint types will show the new type you added.
I have added a new column named “MyHeader” to my publishing page content type. Now when I try to add text to the column, it will validate it. See a simple validation
SharePoint 2010 is extensible as you can build and deploy custom fields that address your custom business requirements.


No hay comentarios:
Publicar un comentario